
|
|
#1
 10-03-2008, 04:47 PM
|
|||
|
|||
|
While this is not actually dog related it is another glass project I've been working on.
I have wanted to do a glass sundial for months, but there have been a number of ways I could do one and I wasn't sure which would be best for me. Since I've been doing so much Freeze and Fuse stuff, my first plan was to do one in this manner. I found and bought several large concrete sundial molds on the internet that would be perfect for doing one with FnF. The problem was that it would also take about 6 pounds of Bullseye powder... which was a lot of powder considering all the other powder I've been buying to feed my FnF projects. So I set it aside and started to do some research on sundials. It's really fascinating reading the history of sundials and how even into the early 20th century they were the most accurate form of telling time, not to mention all the different types of sundials that have been made over the centuries. But to be accurate, they have to be made for the exact location that they will be used to tell time at. I also found out that the garden sundials that most people buy (and the ones from the concrete molds) are probably not going to be accurate any place on the earth. They are only meant to be decorative and not actually used for telling time. And of course I wanted one that was fairly accurate for my location. But then I read about the math required to actually calculate where to put the lines and gnomon (the thing that creates the shadow) to make them accurate. That almost made me forget the idea right there. I had a choice of a round or square horizontal sundial. I decided on square so I wouldn’t have to cut out a glass circle… at least for this first one. I have an idea of creating a round disk with one of my round stainless steel molds in the pot melt fashion and then build up from there. But that’s getting way ahead of myself. I started with a 4mm sheet of 10x10†Bullseye Tekta clear glass to use as my base. I set the glass on top of my printed sundial example, which will show me where to put the stringers I planned to use as my number guides. I used 2mm Bullseye dark green stringers (I really wanted to use black, but the only black ones I had were the really tiny stringers). I laid out the stringers using some tacky glue to hold them in place. This is the first time I’ve used a lot of glue in a project and I was a little worried it wouldn’t burn off clean, but I was relieved to see that it seems to have done so just fine. This is a picture of the sheet of glass with the diagram underneath and the stringers glued in place: 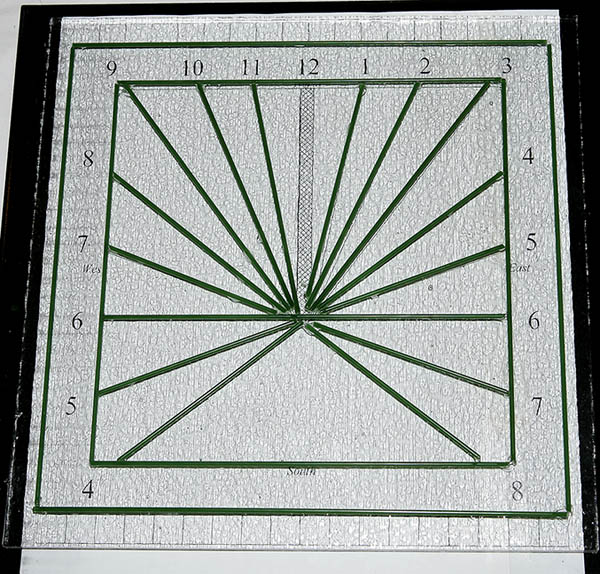 The shaded area underneath the 12 is where the gnomon will go. That will be a half inch thick piece of glass at the correct angle for my location. I’ve not decided yet on if I will try to tack fuse it in place or just glue it. But I’m a bit away from that point yet. The next thing I did was start filling the spaces in-between the stringers with frit. I went with Egyptian Blue Opal for the outside ring and Woodland Brown Opal for the next ring. Since the shadow of the gnomon is going to need to be seen I went with white for the inner rings and then covered the whole thing with clear. I realized afterwards that I should have covered it with white. Because the stringers are only 2mm I could only build up the frit between them that high without them spilling over. This left a few thin areas and a couple of small spots that opened up (that is the black tile the glass is sitting on showing through in the next picture that looks like black frit in the white). Had I used white, it would have made it opaque rather than transparent. I could still put another layer on or just put another sheet of glass underneath, but I think I’ll just remember it for next time and continue on with this one as it is. Once I got all of the frit sprinkled on, I stuck it in the kiln and fired it. I used the same schedule I have used with most of my other frit tiles I’ve done, which are based on Richard La Londe’s book. Here is a picture of it out of the kiln: 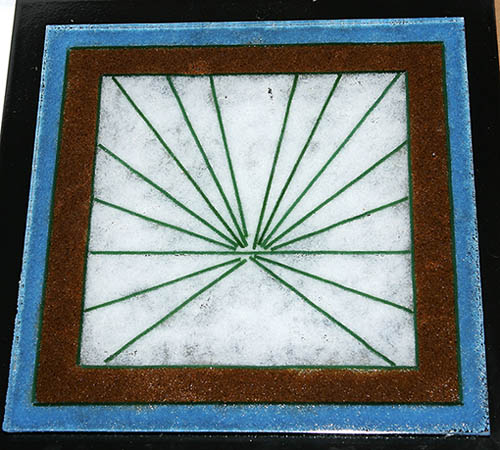 I knew I had not positioned the stringers at the center right up against the 6am to 6pm cross line, but I didn’t realized that I’d missed by that much until I saw it out of the kiln. It’s important that all of the lines meet at the same place, so the stringers would have been crowded at that point, so I shortened them a bit. I’m going to hide that by putting something over the spot, a wafer or some other piece of glass. Here is an example of a wafer in the center (I’ll use a different color than the Pimento Red 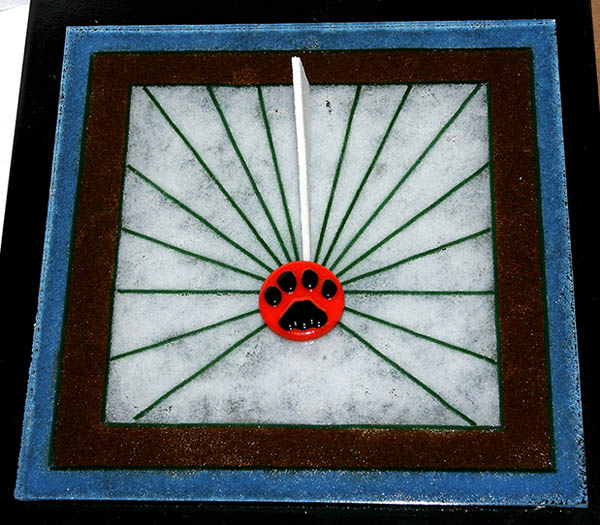 I’ve already got some ideas for another one, but I’ll finish this one up and test it out in the sun to see how close I came to it being accurate. Once I fire polish this to smooth out the edges, add the numbers to the brown area and get the gnomon done and installed, I’ll just need to find and point the gnomon towards true north see how it does. If I’m within 10 or 15 minutes, I’ll be satisfied with this one. And hopefully we won’t start our rainy season and not have any sun until next June. Mike 
|
|
#2
10-03-2008, 04:48 PM
|
|||
|
|||
|
I've finally finished (except for one final detail) my first sundial. I figured out what to do about getting the gnomon to stand up, which was to put a slit in the disk that I placed at the center of the lines. So the disk hides the un-eveness of the ends of the green number lines but also is the support piece for the gnomon.
It took a couple of tries to get the slit the right size and I still ended up using a small diamond bit in my grinder to grind it out though. I also used my bigger dimond bit to grind the bottom of the gnomon flat. I thought it would take a bit of grinding to do, but the dimond bits I have for my GlasStar G8 made very short work of getting a flat edge so that it would stand on it's own. After I finished with the disk I ground down the edges of the sundial, placed the disk where I wanted it and did a fire polish/tack fuse. The one thing I have not done yet is to actually glue the gnomon in the slit and to the plate of the sundial. I'm not sure what I'll use yet, but it will probably be a clear silicon glue of so kind so it will also be water proof. And it won't be so obvious along the eges of the gnomon since it will be clear. Here are a couple of pictures of my sundial: 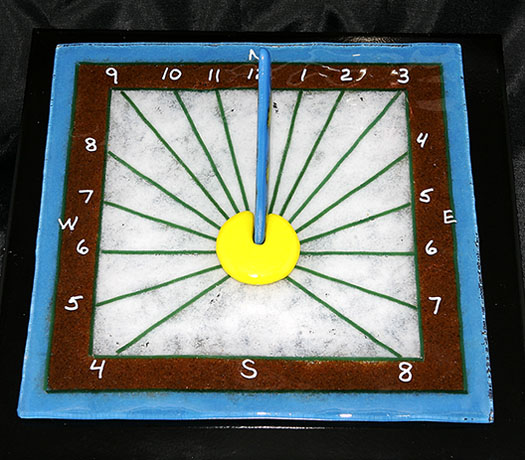 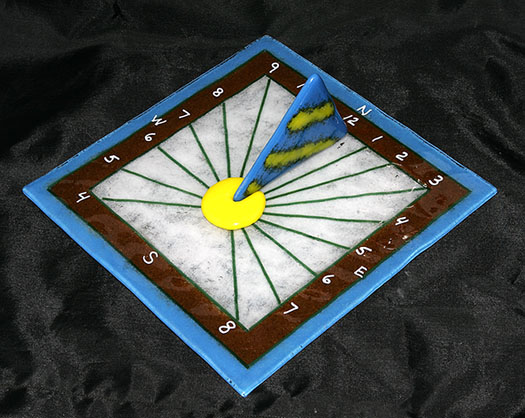 This has been a fun and interesting project and I have a number of ideas to try when I do the next one. I did find out that the calculations I used for this one was Standard Time rather than the summer Daylight Savings Time. Since there is more sunlight in the summer months, the next one I'm going to find out how to adjust it for DST. For this one I'll tell people that, just like with the VCR, I lost the remote and can't adjust it for the time change. Mike
|
 |
| Tags |
| sundial |
| Thread Tools | |
| Display Modes | |
|
|


 Linear Mode

